
Wether you were lucky and your mom made them just for you or you would get them in your local asian neighbourhood, chances are that you’ve already… Read more “All about dumplings”
Carbonara alla Francesco
Everything you see I owe to spaghetti.
– Sophia Loren
La carbonara is one of the most discussed dishes here in Italy. The never-ending search for the true origin of traditional italian recipes, so typical of the italian culture, seems to manifest all its strength when it comes to the topic of this iconic dish. In fact, this can be so complex that a lot of italians will stop returning to a restaurant solely if they believe their carbonara is not respecting the unbreakable rules behind its preparation (like using cream in the egg sauce…eew).

It is said that the carbonara was invented right after the World War II when the Americans came to Italy, bringing with them recipes like the classic egg and bacon breakfast. Not long after that, an Italian came with the delicious idea of combining the best of both worlds. In other words…pasta+egg+bacon = heaven. Whether this story is true or not, we will never know! But you can’t deny this dish is a MUST for your next italian dinner.
Personally, I’ve never met an Italian who doesn’t know how to make carbonara; everybody knows how to do it and they all claim to do it the right way or alla romana. But the truth is they all make a different and mildly personalised carbonara and this is my version!
INGREDIENTS FOR LA CARBONARA ALLA FRANCESCO (2 SERVINGS)
- 240g Spaghetti (the thicker the better in my opinion)
- 100g Guanciale (pork cheek)
- 3 eggs
- 70g Parmiggiano Reggiano
- 20g Pecorino Romano
- Black pepper
- Salt
DIRECTIONS
- Take a large saucepan and fill it with water. Add salt and bring it to a boil over a medium/high heat. You can now add the pasta. For the cooking time consider always about 2 minutes less than the cooking time written on the box.
- Cut the guanciale in small stripes or cubes and put them to cook on a wok (or a large frying pan) over medium heat. Cook them until they will brown a bit, making them crunchy.
- Meanwhile the pasta is cooking, start preparing the egg sauce. Put two eggs and one extra egg yolk on a bowl (consider always one egg for person plus one egg yolk each two persons) and add 60g of Parmiggiano Reggiano and 20g of Pecorino Romano (the remaining Parmiggiano will be used at the end to thicken the sauce when combined with the pasta). Add black pepper and mix the ingredients with a fork.
- When the pasta is done put it on the pan where you cooked the guanciale . Make sure to save some water from the saucepan where the pasta was cooked (we will need it to cook the egg sauce and make the pasta creamier).
- Over a low heat start mixing the pasta and the meat. Slowly add the egg sauce that you prepared before while you are mixing the pasta. Keep mixing without stopping and add the water of the pasta to make the sauce creamy and to not overcook the egg inside the sauce. Attenzione! If you add too much water you will have to balance it with some extra Parmiggiano or let it cook over medium heat for some seconds keep mixing it. The entire procedure of mixing should last about 2 or 3 minutes.
Your pasta is ready! Enjoy with some black pepper and all the Parmiggiano your soul is craving 😉

Morrocan tomato soup & Tabbouleh
The heart of a fool is in his mouth, the mouth of a wise man is in his heart.
– Moroccan Proverb
Most people would be surprised that a big part of the mexican population is very familiarised with some arabic dishes. Even though we might not be the greatest conousseurs of the middle east traditions, Mexico has a huge variety of places that offer different arabic dishes and our love for the middle east gastronomy is so big that it had influenced the mexican culture very deeply. A good example of this are the famous “Tacos arabes” and the “Taco al pastor” which is one of the most famous taco in Mexico.
This is because Mexico has a lot of Lebanese immigrants! And this one is also the most economically powerful Lebanese community in the world (spoiler alert: Carlos Slim). There are many reasons why the Lebanese community decided to call Mexico their home, but the relationship started in 1892 with ships arriving to escape from the Ottoman Empire. But even if it’s been a long time, the Lebanese arrival to Mexico introduced a lot of of yummy dishes to the country including kibbeh and tabbouleh.

Needless to say, the Lebanese in Mexico not only taught us to say “habibi” but they also left us craving for more of their delicious gastronomy! Personally for me this meant a new culinary world to discover and new possibilities to surprise friends and family on a sunday evening. The consequence of that is two VERY EASY recipes that anyone who wants some middle east flavor in their home can make in less than an hour. I promise! Try them!
Ingredients:
- 2 1/2 cups (1 lb 1oz/ 500g) granulated sugar
- 1 1/4 cup (300ml) water
- Squeeze of fresh lemon juice (about 1 teaspoon)
- 1 tablespoon (15g) rose water (more or less according to taste)
- 1 tablespoon (15g) orange blossom water (more or less according to taste)
Tomato Soup
- 3 tablespoons extra virgin oil
- 1 small yellow onion, chopped
- 3-2 cloves garlic, smashed or chopped
- 2 tablespoons fresh thyme leaves
- 1 teaspoon paprika
- 1/2 teaspoon ground cumin
- 2 (28 oz) cans diced roasted tomatoes or tomato puree
- 2-3 tablespoons harissa sauce (you can always add any red pepper spicy paste instead)
- 2 teaspoons honey
- 1 can (14 oz) full fat coconut milk
- 1/4 cup fresh cilantro or basil, chopped
- 4 oz goat cheese
- Crispy or roasted chickpeas for serving
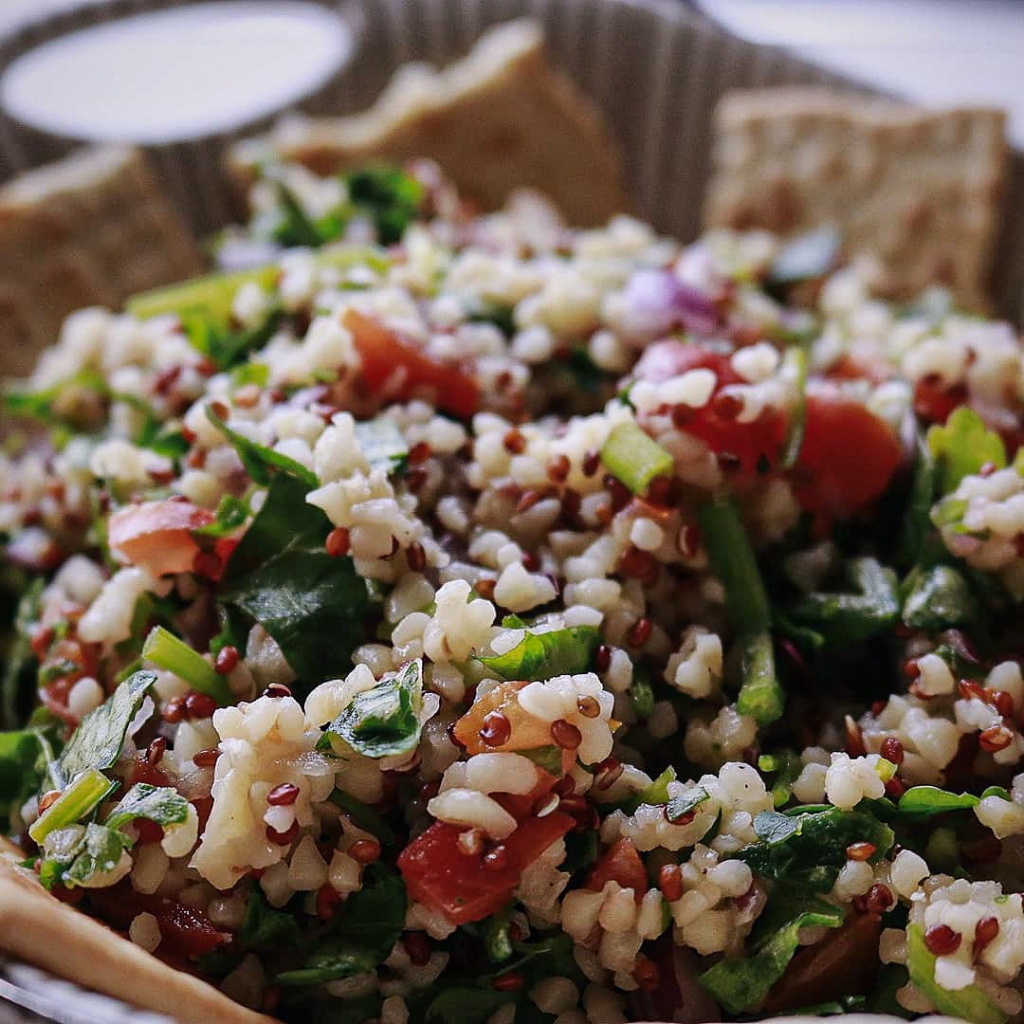
Directions (Tabouleh):
- Cook your bulgur and/or quinoa and set aside to cool.
- Combine in a small bowl the olive oil, lemon juice and 1 teaspoon of both salt and pepper.
- Thoroughly rinse parsley. Parsley is a dirty one! So be careful here! Once you are done make sure to dry the parsley very well from any excess water. Get it as dry as you can, this will make the difference between a good Tabouleh and a meh one. Pick the leaves and finely chop them (you can use a food processor but don’t over chop!)
- Finely chop the onion, garlic and tomato.
- Add the onion, tomato, parsley, bulgur/quinoa to the small bowl with the rest of the ingredients (step 2). Stir to combine, add salt and pepper to taste! You can serve with pita (or crackers if you are a lazy person like me) and Greek yogurt!
Directions (Tomato Soup):
- Heat your olive oil in a pot over medium heat. When the oil shimmers, add the onion and garlic, and season with salt and pepper. Cook 5 minutes or until the onion is fragrant and caramelized (you can add a bit of water in order not to burn the onion and the garlic).
- Add the thyme, paprika, and cumin, cook a minute or two.
- Stir in the tomatoes, harissa, and honey. Cook until bubbling and then add the coconut milk. Stir for circa 2 minutes.
- Transfer the soup to a blender and puree until mostly smooth (Its important not to blend the soup first so that the flavours intensify and the tomato taste is roasted). Return the soup to the pot and place over medium heat, Stir in the cilantro and half of the goat cheese. This is the right moment to season with salt and pepper to your taste. You can also thin the soup more by adding more coconut milk, personally i prefer this soup on the creamy side instead. Cook until warmed though, 5-10 minutes.
- To serve top with goat cheese, cilantro, and chickpeas.
Chipotle pork Gyoza & teriyaki glaze
And her dumplings were so light they would float in the air and you’d have to catch ’em to eat ’em.
– Fannie Flag
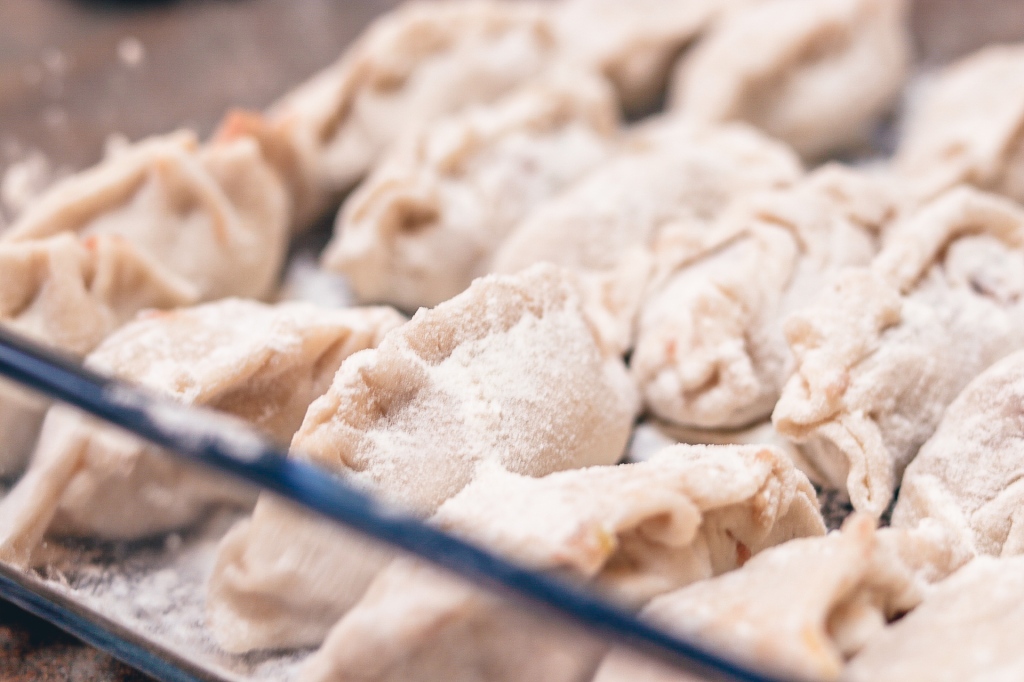
Making gyoza is definitely not fast, but seeing them all fluffy and ready on your table is a wonderful sensation! That’s why after having a crave attack for this classic dish we decided to make them on a Sunday morning. This dish in particular is a great weekend recipe to try since one has more spare time and you can freeze these beauties for up to two months with no problems.
This classic japanese dish has many variations and all equally as delicious. However after a quick search on google for base recipes for Gyoza dough we realized that the public used different words for it and sometimes they would even call them dumplings. So we asked ourselves, what is the difference between gyoza and dumplings?

Well it’s pretty simple indeed. Gyozas are the Japanese version of the big family of dumplings. To be precise, they’re the Japanese interpretation of the Chinese jiaozi. There are a lot of types of dumplings in Asia, in fact dumpling is just an umbrella term for a vast world of delicious filling wrapped with dough that you can find all over asia (being myself an italian I can say that tortellini is basically a dumpling). This is the case of gyoza, the Japanese for jiaozi, a type of chinese dumpling. A similar version of the jiaozi exists also in Korea, they’re called Mandu.

Even though the filling and the preparation methods between jiaozi and gyoza differ, in terms of ingredients they share a lot in common. But you can usually taste more garlic in the Japanese Gyoza’s fill and a thinner dough!
In our version, we decided to explore the world of gyoza for the first time by adding some slight mexican twist that we can assure you it will impress all your co-workers when you re-heat them in the office the next day (we test it! works wonders!)
Ingredients:
for the filling
- 1/8 Chinese cabbage (or any cabagge)
- 500g minced pork
- about a tsp of ginger peeled and grated
- 1 tbsp Shaoxin wine (or red wine da cucina)
- 1/4 cup of garlic chives cut into small pieces
- 1 clove of garlic
- salt and white pepper
- 1/4 tsp of sugar
- 1 tbsp of chipotle sauce
for the dough
- 3 cups of plain flourn plus some extra for dusting
- 1-1 1/2 cups of boiling water
for the sauce
- chipotle sauce
- 1/2 cup of soy sauce
- 1/4 cup of sugar
- 1 tbsp balsamic vinegar (or/and lemmon juice)
Preparation:
- For the dumpling dough, place the flour in a bowl and add the hot water. Knead it until the dough is smooth (if you have a stand mixer it will take approximately 10 minutes, but the process can be made also by hand, with some more patience). Remove from the bowl and wrap it in a plastic film with some flour. Let it rest for at least 30 minutes.
- To start the filling cook the cabbage with some water in large pan for about 5 minutes until tender. After the cabbage is ready refresh it with cold water. Put them in another bowl and use your hands to squeeze out as much liquid from the cabbage as possible. Finely chop the cabbage.
- In a food processor or a stand mixer combine pork, ginger, garlic, salt, Shaoxing wine, sugar, pepper and the chopped cabbage until all the ingredients are combined. Refrigerate the filling for 30 minutes.
- Take the dough out and cut it in half. Roll each half into a cylinder not more than 2-3 cm of diameter. Cut the cylinder into 1 cm pieces and roll each one into a circle shape. You can also use any circular cutter to help you obtain a perfect shape for your dumpling skins, this will be faster. Add about 2 tsp of filling to the centre of the skin and fold the dumpling adding some water in the corners to glue each part as you close it (there is no right way to fold a dumpling so be creative if you want!). Also, if you want to freeze them now its the time to place them with some flour inside a glass or plastic tupper inside your freezer.
- Bring to a boil some water in a pan (you can alternatively use broth) and put the dumplings in the boiling water. When the dumplings float to the surface, cook for a further 1 minute and then remove (similarly to the gnocchi). Once the gyoza are done let them rest in a plate being careful not to put them on top of each other while they are hot since they can stick.
- For the teriyaki sauce, place the soy sauce, vinegar and the sugar in a small saucepan and let it reduce over medium heat. Once the mixture reduces and looks glossy let it rest for 5 minutes.
- Take a large non-stick saucepan over medium-high heat and add a little bit of oil. Place the dumplings and add the teriyaki sauce made before. When you see a brown crust is forming on top of the dumplings, means they are good to go. Serve them with the chipotle sauce on top!
Hello world!!!
If you had never experienced abbiocco before, then that is something WE CARE to change.
Nua Pad Krapow
You’ll never wok alone.
– A true wok and liverpool fan
Eventhough the Nua Pad Krapow is such a simple recipe, it has a very special place in my heart. During my last year of college I went to Thailand to meet one of my best childhood friends and just the smell of this dish brings me back to the urban jungle of Bangkok! So if you are looking for some comfort food…wok your way into the weekend by cooking this popular Thai dish than can’t get any easier!

The famous Nua Pad Krapow is considered a sort of fast-food in Thailand. Almost like the equivalent of a hotdog or a sandwich. You can find it all over Bangkok in small little street food shops that sell it as one of the most wanted quick lunch alternatives for the busy life of the city.

The original recipe uses chicken as the main protein. But it’s not a sin to substitute it with pork or beef! Being a street food classic in Thailand, it’s quiete common to find some personal touch depending on where you get it. You can eat it with rice instead of a fried egg or you can eat it with both! No matter how you decide to enjoy your Nua Pad Krapow…this recipe will help you in learning the essential to make it delcious!
Ingredients:
- 250g beef and pork mince
- 2 garlic cloves
- 1 red chilli (you can use any red or green spicy chilli you prefer)
- 2 tbsp of peanut oil
- 1 tsp of sugar
- 1 pack of fresh basil leaves
- 2 eggs
- 2 tbsp of fish sauce (or soy sauce if you prefer)
Directions:
- Heat your wok in very high heat, once its smoking add the oil on the sides so it slowly drips into the center of the wok. Meanwhile it gets warmer, make sure to chop the chilli and the garlic.
- Drop the chilli and the garlic in the wok and constantly stir until fragrant.
- Add the meat and the sugar. Toss them around until the sugar starts to caramelise and the meat begin to get brown. Add the sauce and stir. This is the step where you taste and season your meat.
- Add the basil to the wok and stir for another couple of minutes making sure not to over cook the basil. Then separate de mixture to another bowl.
- Let some clean running water into your wok and get it back in the stove to dry. When the wok is very hot, add the oil for the fried eggs. Make sure to fry them until the edges are crispy and brown.
- Serve the beef and the egg on top of your plate! Enjoy!
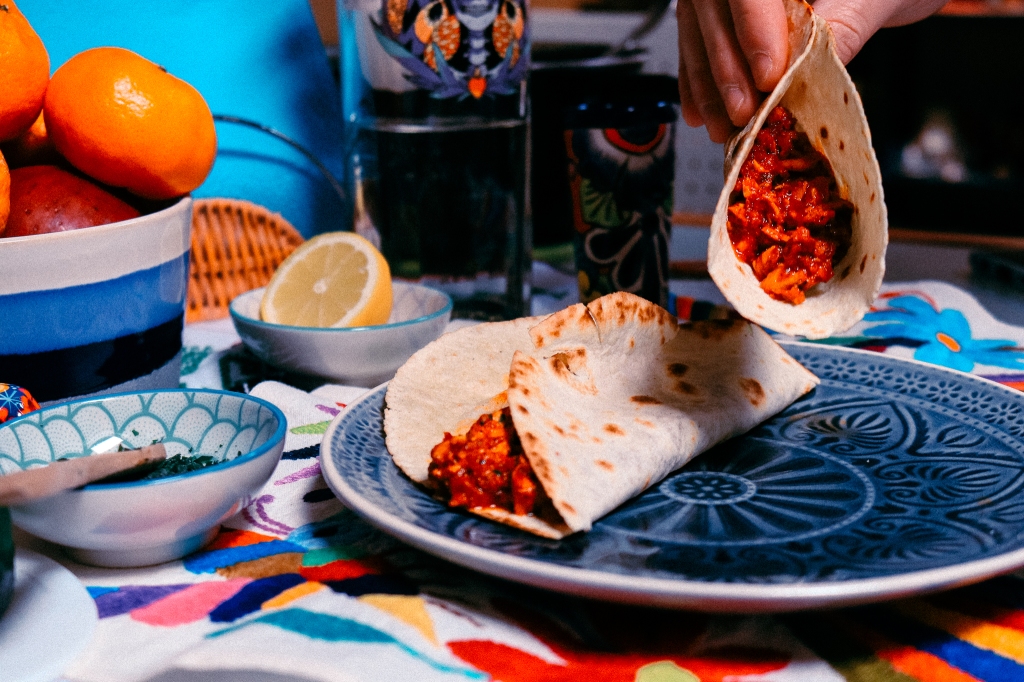
Cochinita pibil tacos
Inhale tacos. exhale negativity.
– Every taco fan ever
Cochinita pibil is a traditional Mexican pork dish from the Yucatán Peninsula. Eventhough this dish is traditionaly from the south of Mexico there is no household in the country that dosent know how to prepare a really good home-made cochinita pibil taco! This dish is part of the must-know unspoken book of living in Mexico and no matter how common it is in our households a good cochinita pibil will always be the star of the table if cooked with love.

Making Cochinita Pibil is not hard! The only problem is that it needs a secret ingredient that is sometimes hard to find if you are not in Mexico (but hey! i made it in Italy!). This secret ingredient is called achiote and it is the heart of Cochinita Pibil. Achiote is a paste made of a mix of annatto seeds (aka achiote), garlic, chilies, bitter orange juice and a mix of seasonings. Sadly without this…there is no cochinita 😦 😦 😦 😦

However if you DO get this bright red paste then you can start the fun! Making Cochinita Pibil is a great way to impress your “I love mexican food” fanatics that had not tried the colorful world of mexican food outside the tex-mex dishes in town. The best part? it’s VERY easy to do…

As with most home recipes…there is not an exclusive way to cook this beloved dish. So we decided to share with you how we make it at home for our saturday taco cravings, with the hope that the outcome is worth that taquito dream of yours.

It really get’s as easy as just popping ingredients into a blender. Because the true trick behind some good Cochinita is the marination time! So be patient and let your Cochinita rest in your fridge for some hours…maybe even the night!
We usually make our own tortillas at home. But we decided to try a brand of tortillas in Milan from Don Jose (if you are in Italy make sure to order online if you want some mexican ingredients in your kitchen).

There is only ONE rule for eating tacos. EAT THEM WITH YOUR HANDS! It’s an insult to the taco if you eat it with a fork,
Ingredients:
- 1 kg of pork
- 1 pack of achiote (almost 110g)
- 1 cup of orange or lemon juice (you can also use white vinegar or the 3 of them!)
- 12 garlic cloves
- 1 large white onion sliced in half
- 1/2 large purple onion (optional)
- 3 habanero chilli
- Any fresh or dried chilli you prefer according to how much you want this cochinita to be spicy ( this part is optional)
- salt and pepper
Directions:
- Prepare the achiote by placing it in a bowl and adding slowly some of the juice/juices of your choice. Do not add the full cup yet, make sure to add a half of it to make the achiote more citric. Once the achiote has completely mixed with the juice, stir it with a spoon and add the mixture in a blender.
- Add the garlic, half white onion season with salt and pepper and blend it all together. Try it and trust your instincts, if you prefer it more citric then add more juice and so on.
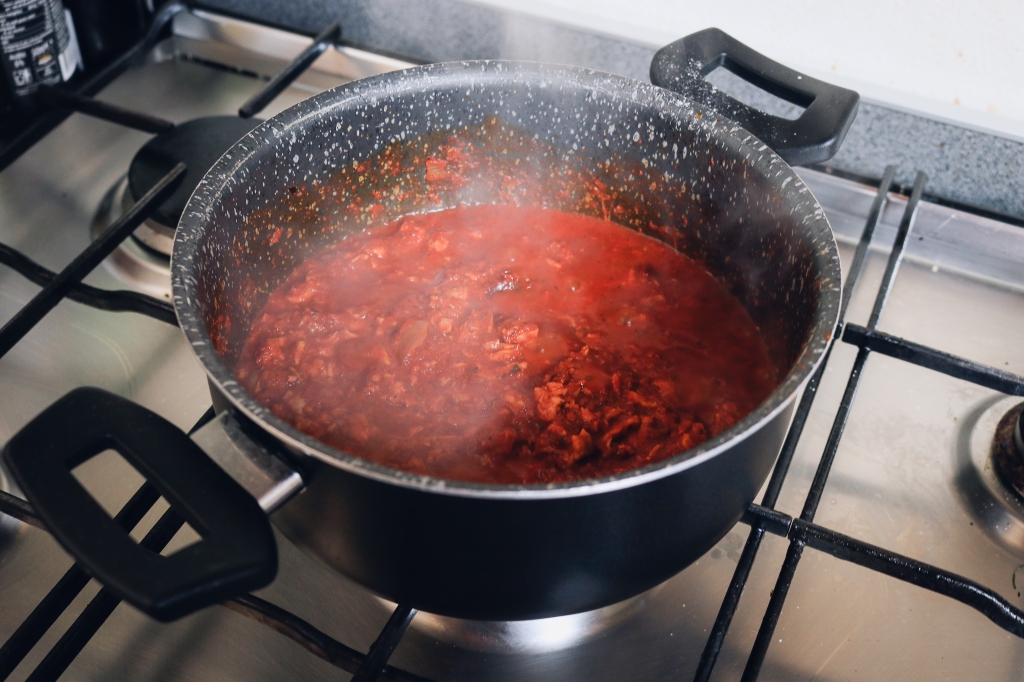
- Cook the pork on a pan until both sides are slightly brown and the center it’s still raw. Add your achiote mixture and let it cook in medium heat for around 40-60 minutes.
- Meanwhile the pork is cooking you can chop the purple onion and the rest of the white one in squares. Chop and add the habanero as well. Mix them in a bowl and add a squeeze of lemon if you like. Save it for serving optionally for the tacos.
- Once the pork is cooked, shred it in a bowl, heat some tortillas and make some tacos!
steamed fish with ginger
SImplicity is the keynote of all true elegance.
– Coco Chanel
Simple things are often misjudged in the home cooking world. We are used to believing the lie that the complex 3 hour recipe for that old famous family dish is far better than anything that takes you less than 20 minutes. We tend to be cruel to ourselves by believing that special occasion dinners must take half of our evening just for the cooking. Our mind does not allow us to think that if a dish is simple can be as special as any other complicated recipe in our cooking book. But in reality gastronomy does not work (thankfully) like the judgy and mean highschool student that sometimes we tend to have in our head. This steamed fish with ginger recipe is the ultimate proof that the basics can be as memorable as any posh Boeuf Bourguignon.

Almost anything can be steamed and this watery technique for cooking is a basic in every kitchen! Don’t let yourself think that this is a boring way to cook because in reality is a great way to elevate the flavours of certain ingredients. No matter how you prefer to steam or with what tool you choose to do it, the trick is in the time and the ingredients inside this savoury sauna.

Besides being a great way to experiment with flavours and aromas, steaming has a lot of health benefits, It does not damage water-soluble nutrients such as vitamin C and it retains antioxidants. It can be your best friend when you are in a hurry for cooking and it can also help you in revisiting an ingredient. In other words…if you are tired of your grilled fish try steaming it! You will taste a completely different thing we promise!
You don’t believe us? Check this list by Crave mag to get more info the benefits of steam cooking.

Steaming can also be very versatile. This is why in asian cuisine the art of steaming is constantly appreciated for different kinds of dishes. From sweet to savoury this technique helps to cook gently and this is why fish is one of the best proteins to experiment with this. The delicate, soft and fresh taste of fish won’t disappear but on the contrary it will be enhanced with the ingredients surrounding it! Give it a try!

Ingredients:
- 1 tbsp of grated ginger
- 1 tbsp Shaoxing wine
- 1 tsp soy sauce
- 1 tsp cornflour
- 2 spring onions finely chopped
- 2 tbsp of peanut or olive oil
- 1/2 cup of coriander leaves or fennel leaves
Directions:
- Prepare your steamer by bringing the water to boil over medium heat.
- On top of plate that can fit inside of your steamer, place your fish after seasoning it with salt.
- Mix in a small bowl the soy sauce, sugar, cornflour and the Shaoxing wine. Pour it over the fish. Scatter the ginger all around the dish.
- Close your steamer and cook it for a around 7 to 10 minutes.
- Once your fish is done, scatter some more ginger spring onion and coriander/fennel. Enjoy!
